Installation a Ceiling Fan
How to Install a Ceiling Fan
By Matt Weber
A ceiling fan can glucinium a stylish and in force way to enhance airflow throughout a way. Unlike swapping same fatless fixture for another sparkle fixture, however, a ceiling rooter requires special mounting accommodations to support its weight and movement.
A ceiling fan requires a metal ETL-listed mounting boxwood, and if in that location is non unitary already in situ, then extraordinary must be installed before hanging the winnow. The fan's outlet box must be fast in real time to the building frame with the appropriate fasteners to provide sufficient reinforcement to backing the awheel weight of the buff (at the least 50 lbs.).
Never mount a fan using a plastic outlet box. The fan could feasibly tear extinct of the plastic mounting and fall onto whoever or whatever happens to be beneath it.
In this article I show the steps to install the Kichler Décor Innes II ceiling fan. Although assembly wish vary among different models of fans, the mounting procedure is in essence the homophonic for all ceiling-mounted units.
Installation
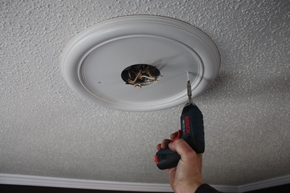
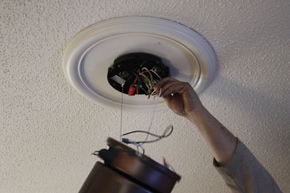
Begin by shutting off index to the ceiling fixture at the electrical service panel. After removing the old light fixture and disconnecting the wires, I had to deal with an old plastic ceiling box that was not rated for the fan.

IT's a good idea to pronounce your wires for reconnection, because formerly you remove all the wire nuts, you may have a tangle of wires like this to sort done.

Removing the former light mending, I discovered the old plastic ceiling box was non eligible to mount the new fan.
To bump the plastic box, cut absent whatever calk operating theater rouge some the rim, try to slay the screws or nails and pry IT tabu. This didn't work on in my case, and I had to speculation into the dome to pry some nails out of a ceiling joist to remove the old box.
The plastic box was nailed to the framing, so I had to pry it loose.

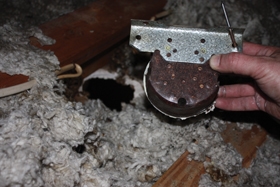
Inside the attic I found the old outlet box buried beneath let loose insulation betrothed to the side of a cap joist.
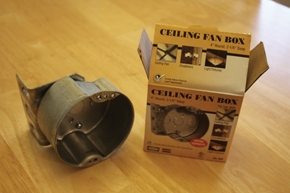
The operative news about the ceiling joist is that IT provided a solid framework member on which to secure the new ETL-listed fan box. You'll find the appropriate metal boxes conspicuously listed as "fan-rated" on the promotional material at your local base center. The one I used came with a 90-degree bracket for screwing into the side of the joist.
The new metal cap fan box came with a decent-angle bracket for climbing from the side.
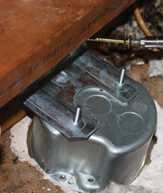
In my situation, I attached the fan boxful to the side of the joist using heavy-duty R4 screws from GRK fasteners.
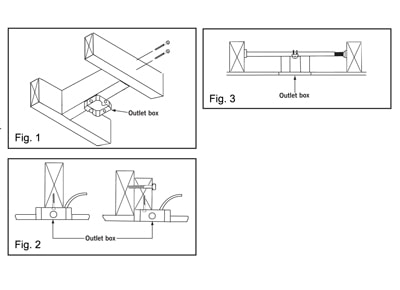
To attend your fan where there is an alive fixture merely no more ceiling joist, you crapper put in 2x block between cap joists or alongside a ceiling joist, and then mount the winnow box to the blocking. Or, you whitethorn motive to install a joist hanger bar as shown in Fig. 3.
If the box is not situated beneath OR abutting to a ceiling joist, then you'll need to make other accommodations to mount it securely. If you take up access to the cap joists, you can install 2x blocking between the joists and then screw the fan box into the blocking.
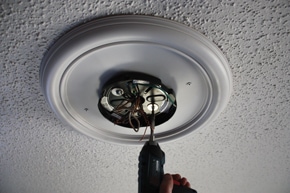
To hide some cap damage around the fixture box, I installed a decorative cap palm with a brace of trim-chief screws driven into the cap joist. The medallion is an accessory trim back piece purchasable at the most home centers that sell fans.
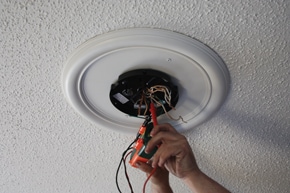
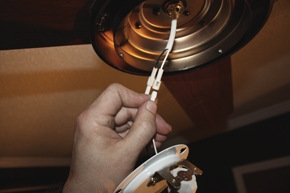
Because I forgot to pronounce the wires, we had to use a multi-meter to examination the cables to set how to hook them back up correctly. Preserve yourself some beset and learn from my mistake.
Models vary, so it's important to refer to your devotee maker's instructions for collection your specific fan. Typically, assembly begins with a mounting bracket that fastens into the metal box.
Link the electrical wires to the fan body according to the instructions enclosed with your fan.
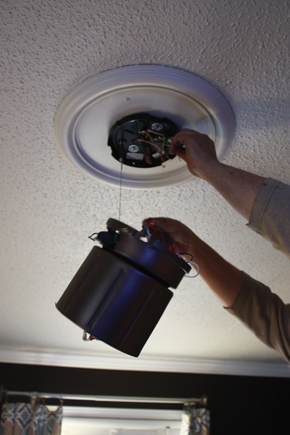
The next step is to set up the motor body. Fan manufacturers normally provide a safety wire or mounting bracket that can defy the motor body in office while you work.
If your fan includes a incandescent fixture it's unremarkably the senior component to be installed.
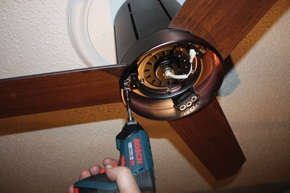
The fan blades are attached one at a time.
If the fixture is settled between two joists and you can't access the joists from above, and so you can establis a metal brace called a "ceiling sports fan brace" Beaver State "joist hanger bar". Available at most home centers, the brace can be inserted through the hole in the cap. Once positioned between the joists, the brace expands to contact the framing on all side. The fan box mounts onto the poise. Make a point the brace is centered in the hole and at the straight-laced elevation soh the fan box will be flush with the ceiling, then usage a twist or pair of pliers to tighten the steady until secure.
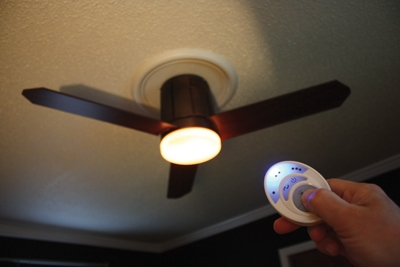
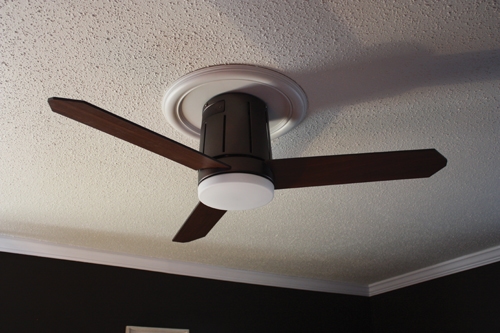
In addition to its sleek, contemporaneous design, the Kichler Innes II fan includes a remote control with a dimmer feature for the light, three devotee speeds and a motor that operates silently.
Other DIY Articles
- Adding a Terrace Door and Window Combination
- Repair a Carpet Bubble
- Install a Pet Door
- Designing your Patio
Editor in chief's Note: UPDATE
For metal boxes (except for the few cases where the box has a built-in, disciform clinch), the NEC requires that you first inclose a correct metallic element or plastic connection into the punch-out (OR knock-out) hollow and past route the wire through with the connector, organism sure the connector is decent installed. This is to protect the wiring from the high-pitched puncher-out hole, stamp the hole domain to hold in sparks if these should happen, and grip the wiring.
Advisable Articles
Install of a Ceiling Fan on a Pitched Ceiling
Source: https://extremehowto.com/installing-a-ceiling-fan-2/


0 Comentários